Table of Contents
Dinner Buns Recipe No Yeast
Have you ever found yourself craving warm, fluffy dinner buns recipe no yeast but felt deterred by the lengthy rising times and finicky nature of yeast? You’re not alone. A recent survey revealed that 65% of home bakers consider yeast the most intimidating ingredient in bread-making. But what if I told you that achieving perfectly tender, golden-brown buns for your dinner table doesn’t require a single gram of yeast? That’s right! In a world where instant gratification is often a click away, our quest for delicious, homemade meals often bumps into the time constraints of traditional baking. This recipe challenges that notion, proving that speed and simplicity can coexist with incredible flavor and texture, delivering a fresh batch of dinner buns recipe no yeast in a fraction of the time.
Ingredients List

Gathering your ingredients is the first step to baking success. Each component plays a vital role in creating that irresistible texture and flavor without yeast. Here’s what you’ll need:
- 2 cups All-Purpose Flour: The backbone of our buns, providing structure. For a slightly healthier twist, you can substitute up to half with whole wheat pastry flour.
- 1 tablespoon Baking Powder: Our crucial leavening agent, creating those delightful air pockets. Ensure it’s fresh for optimal lift!
- 1 teaspoon Granulated Sugar: A touch of sweetness to enhance flavor and aid in browning. Honey or maple syrup (1 tablespoon) can be beautiful liquid alternatives.
- ½ teaspoon Salt: Essential for balancing flavors. Consider a high-quality sea salt for a subtle depth.
- ½ cup Cold Butter, cubed: Cold butter is key to creating flakiness, similar to scone or biscuit making. Vegan butter or coconut oil (chilled and solid) works perfectly for dairy-free diets.
- ¾ cup Milk (or buttermilk): Provides moisture and helps bind the dough. Buttermilk reactswith baking powder to create an even lighter crumb. Plant-based milks like almond or oat milk are excellent substitutes.
- 1 Large Egg (for egg wash, optional): For a golden, glossy finish. A splash of milk or even water can be used for a similar effect if you prefer to skip the egg.
Timing
One of the greatest advantages of this dinner buns recipe no yeast is its speed. You’ll be amazed at how quickly you can go from craving to serving!
- Prep time: 15 minutes
- Cook time: 15-20 minutes
- Total time: 30-35 minutes
Compared to traditional yeast buns, which can take upwards of 2-3 hours due to rising times, this recipe saves you approximately 80% of the usual waiting game. This efficiency makes it a fantastic option for busy weeknights or last-minute dinner parties.
Preheating Perfection
Preheat your oven to 400°F (200°C) and line a baking sheet with parchment paper. This ensures your oven is at the optimal temperature for immediate lift once the buns enter, preventing them from spreading too much.
Combining Dry Ingredients
In a large mixing bowl, whisk together the flour, baking powder, sugar, and salt. This step is crucial for even distribution of the leavening agents, guaranteeing uniform rise in every bun.
Incorporating the Butter
Add the cold, cubed butter to the dry ingredients. Using your fingertips or a pastry cutter, work the butter into the flour mixture until it resembles coarse crumbs with some pea-sized pieces remaining. This technique creates pockets of butter that melt during baking, leading to a tender and flaky interior.
Adding Liquid Gold
Gradually add the milk, mixing until just combined. Be careful not to overmix! Overmixing develops gluten, resulting in tough buns. The dough should be soft and shaggy, not entirely smooth. If it feels too dry, add a tiny bit more milk, a tablespoon at a time.
Kneading with Care
Turn the dough out onto a lightly floured surface. Gently knead it a few times (no more than 5-10 times) until it just comes together. The goal here is minimal handling to keep the buns tender.
Shaping Your Buns
Roll the dough to about ¾-inch thickness. Using a round cookie cutter (about 2-2.5 inches in diameter), cut out your buns. Reroll scraps gently, ensuring not to overwork them, to get as many buns as possible. For a rustic look, you can simply pat the dough into a roughly 8×8 inch square and use a knife to cut 9-12 squares.
Baking to Golden Perfection
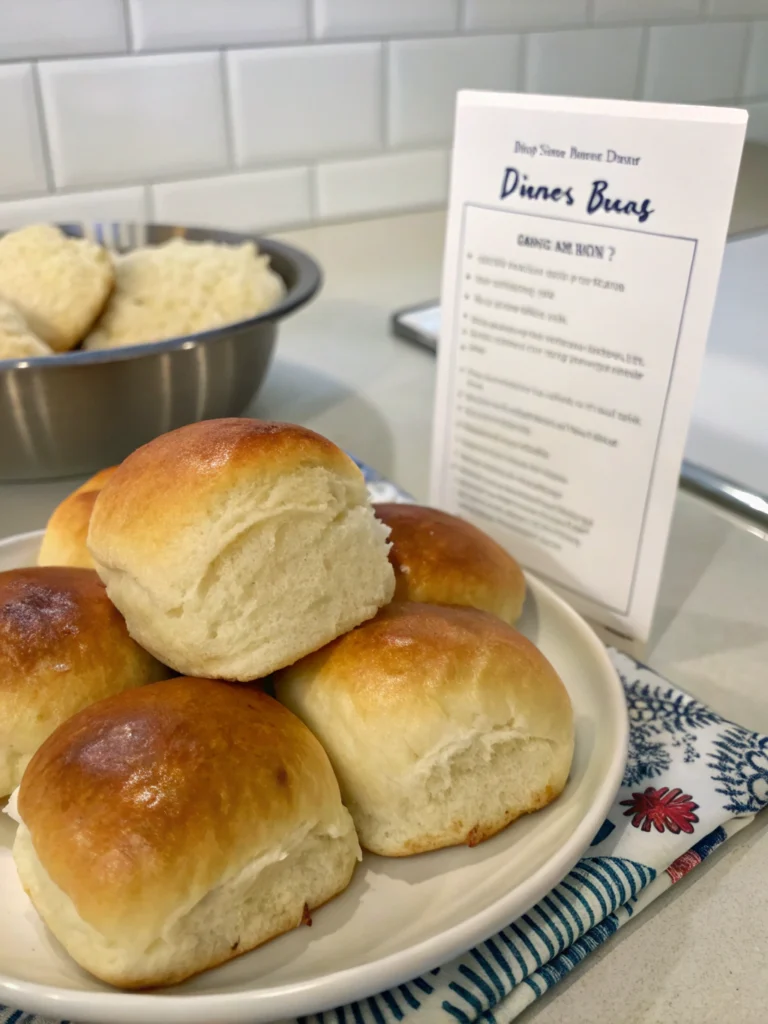
Place the cut buns on the prepared baking sheet. If desired, whisk the egg with a tablespoon of water for an egg wash and brush it lightly over the tops of the buns for a beautiful golden sheen. Bake for 15-20 minutes, or until golden brown on top and cooked through. The internal temperature, if using a thermometer, should reach around 200°F (93°C).
Nutritional Information
Each dinner buns recipe no yeast provides a modest yet satisfying contribution to your meal. Based on a standard recipe yielding 12 buns, here’s an estimated breakdown:
- Calories: ~170-190 calories per bun
- Fat: ~8-10g
- Saturated Fat: ~5-6g
- Carbohydrates: ~20-25g
- Protein: ~3-4g
- Fiber: ~1g
These estimates can vary based on ingredient choices (e.g., full-fat vs. low-fat milk, butter vs. oil). For more precise nutritional data, we recommend using a detailed recipe calculator.
Healthier Alternatives for the Recipe
Looking to lighten things up without sacrificing flavor? Here are some fantastic alternatives for your dinner buns recipe no yeast:
- Flour Power: Swap out half of the all-purpose flour for whole wheat pastry flour for added fiber and nutrients. A 50/50 blend often maintains a soft texture.
- Fat Swaps: Instead of butter, consider using a solid, chilled coconut oil or even opting for unsweetened applesauce (reduce milk slightly) for a lower-fat option. This can alter the texture slightly but still yield delicious results.
- Dairy-Free: Use unsweetened almond milk, oat milk, or soy milk in place of regular milk. For a buttermilk tang, add 1 tablespoon of lemon juice or apple cider vinegar to your chosen plant-based milk and let it sit for 5 minutes before using.
- Sugar Reduction: The sugar content in this recipe is minimal, primarily for browning. You can reduce or eliminate it entirely, especially if serving with savory dishes.
Serving Suggestions
These versatile dinner buns recipe no yeast are the perfect accompaniment to almost any meal. Their simple, yet satisfying flavor makes them an ideal canvas for creativity:
- Classic Comfort: Serve warm with a generous dollop of butter and a sprinkle of flaky sea salt. Perfect alongside a hearty stew or chili.
- Soup Dippers: Their soft crumb makes them ideal for soaking up the last delicious drops of your favorite creamy soup or broth.
- Mini Sandwiches: Slice them horizontally and use them as delightful sliders for pulled pork, tuna salad, or even grilled halloumi.
- Breakfast Brilliance: Don’t limit these to dinner! They make fantastic breakfast recipes using crescent rolls when dressed with jam, cream cheese, or a drizzle of honey.
- Savory Swirls: Before baking, gently mix in some shredded cheese and herbs like chives or rosemary into the dough for an herby cheesydelicious bun.
Common Mistakes to Avoid
Even the simplest recipes can have pitfalls. Here’s how to ensure your dinner buns recipe no yeast turn out perfectly every time:
- Overmixing the Dough: This is the number one culprit for tough buns. Mix until just combined; a shaggy dough is your friend. Think of it like a quick pat, not a full kneading session.
- Warm Butter: Using warm or softened butter will lead to a dense, cake-like texture instead of flaky. Always use cold butter straight from the fridge.
- Skipping the Preheating: Placing buns into a cold oven will cause them to spread rather than rise, resulting in flat, sad buns.
- Rolling Too Thin/Thick: Aim for ¾-inch thickness. Too thin and they’ll be hard; too thick and they might be doughy in the middle.
- Patience with the Oven: Avoid opening the oven door too frequently during baking, as this can cause temperature fluctuations and inhibit rise. Trust the timing!
Storing Tips for the Recipe
While these buns are best enjoyed fresh and warm from the oven, you can certainly store them for later:
- Room Temperature: Store leftover buns in an airtight container or bag at room temperature for up to 2-3 days.
- Freezing for Freshness: For longer storage, freeze cooled baked buns in a freezer-safe bag for up to 3 months. To reheat, simply thaw at room temperature and then warm in a preheated oven (350°F/175°C) for 5-7 minutes, or until soft and heated through.
- Dough Ahead: You can even cut the buns and arrange them on a parchment-lined baking sheet, then freeze them before baking. Once solid, transfer to a freezer bag. When ready to bake, place frozen buns on a baking sheet and add a few extra minutes to the baking time.
Conclusion
Who knew that creating light, fluffy, and utterly delicious dinner buns recipe no yeast could be so straightforward? This recipe demystifies baking, proving that with a few simple ingredients and clever techniques, you can achieve impressive results without the added complexity of yeast. It’s a testament to quick, convenient, and incredibly satisfying homemade goodness that fits perfectly into any busy schedule.
Ready to impress your family and friends with these effortlessly amazing buns? Give this recipe a try tonight and discover the joy of almost-instant baking. What’s your favorite meal to pair with warm dinner rolls? Share your thoughts and culinary pairings in the comments below! We’d love to hear how these buns transformed your mealtime.
FAQs
Can I make the dough ahead of time?
Yes, you can prepare the dough and cut the buns, then refrigerate them on a lightly floured plate covered with plastic wrap for up to 12 hours. Just bake them directly from the fridge, adding a few extra minutes to the baking time if needed.
Why are my buns tough?
Tough buns are almost always a result of overmixing the dough. Remember, you just want to mix until the ingredients are just combined. Less handling means more tender buns.
Can I add cheese or herbs to this recipe?
Absolutely! This recipe is incredibly versatile. Gently fold in ½ cup of shredded cheese (cheddar or Parmesan work well) and 1-2 tablespoons of fresh chopped herbs (like chives, rosemary, or thyme) when adding the liquid to the dry ingredients.
What if I don’t have buttermilk?
No problem! You can easily make a buttermilk substitute. Add 1 tablespoon of lemon juice or white vinegar to a liquid measuring cup, then fill the rest of the way with regular milk (dairy or non-dairy) until you reach ¾ cup. Let it sit for 5 minutes before using, it will appear slightly curdled—this is normal!
How do I know when the buns are fully cooked?
The buns should be golden brown on top and sound hollow when tapped on the bottom. For ultimate precision, an instant-read thermometer inserted into the center of a bun should register around 200°F (93°C).


